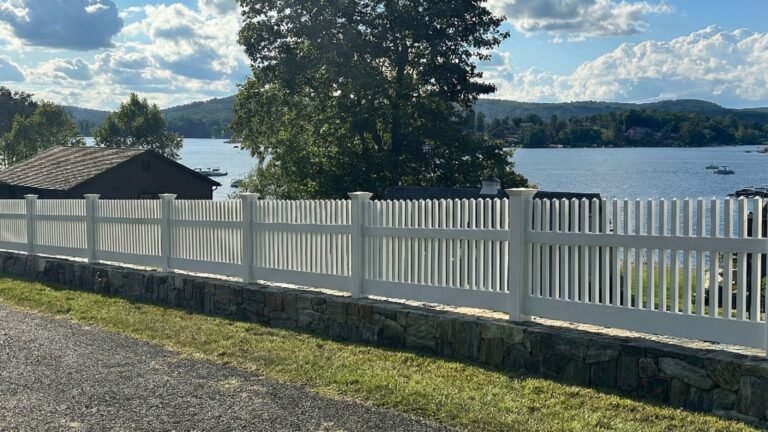
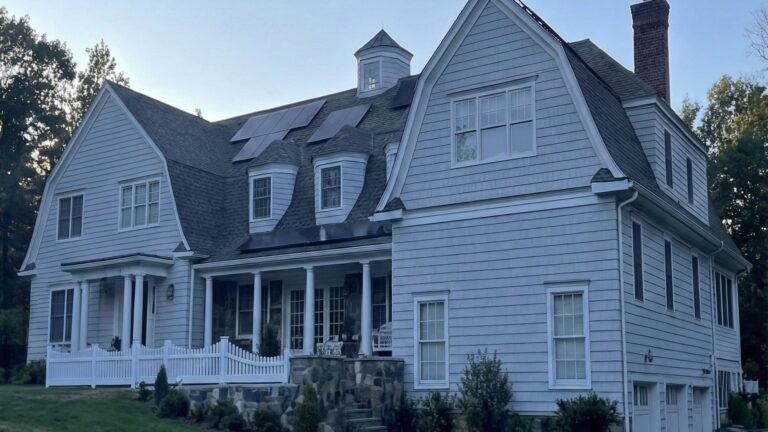
Fence Install for Homeowners in Ridgefield, CT
You’re standing in your yard, watching a crew unload equipment, and a question hits you: How long will my property look like a construction zone? Most Ridgefield homeowners ask this exact question when planning a fence installation checklist in Ridgefield CT, especially given the area’s rocky soil conditions and strict local zoning requirements. The truth is, with proper planning and understanding of the process, your yard disruption typically lasts just 3-7 days, with the heaviest impact concentrated during post-setting on Day 2. Connecticut’s unique regulations around property lines, spite fences that can annoy neighbors, and municipal zoning permits mean you can’t just start digging without understanding what you’re getting into. Whether you’re installing privacy fencing in your backyard or adding a decorative boundary along your front property line, following a structured approach keeps timelines predictable and prevents costly mistakes. Your neighbors, your wallet, and your lawn will thank you for taking the time to understand what happens when professional installers arrive with post hole diggers and concrete mixers.
Key Takeaways
- Standard Projects Take 3-7 Days: Most 100-200 foot fence installations in Ridgefield finish within 3-5 days, though rocky soil or permit delays can extend the timeline to a full week of active work.
- Post Installation Causes Peak Disruption: Crews dig 2-3 foot holes below Connecticut’s frost line, then pour concrete that needs 24-48 hours to cure before panels can be attached, creating the most visible yard impact.
- Early Permit Applications Prevent Delays: Ridgefield’s Planning and Zoning Department requires 30-45 days for zoning permit reviews, and calling 811 for utility locates prevents dangerous surprises underground.
- Cleanup Happens Quickly: After rails and panels go up on Days 2-3, contractors reseed disturbed areas and haul debris, typically restoring your yard within the same week of completion.
- Height and Design Rules Are Specific: Front yards max out at 4 feet, rear fences at 6 feet with proper setbacks, and Connecticut law prohibits spite structures built maliciously to block views or annoy neighbors.
- Final Inspection Closes the Process: Same-day zoning compliance checks confirm your fence meets all local requirements before you can consider the project officially complete.
Understanding the Fence Installation Process in Ridgefield, CT
The fence installation process in Ridgefield follows a predictable sequence of steps, but local factors like zoning variations, Connecticut’s spite fence laws, and Northeast terrain conditions require adaptations that prioritize compliance over speed. Unlike flat-terrain states where crews can rush through installations, Connecticut’s rocky soil and strict municipal oversight mean taking time upfront saves you from headaches later.
Ridgefield homeowners benefit from understanding how the process differs from what you might read in generic online guides. Your property’s unique characteristics, from drainage patterns to proximity to property lines, influence how contractors approach each phase. The goal isn’t just getting a fence up quickly. It’s getting one that stays standing through harsh New England winters, passes zoning inspections, and doesn’t spark disputes with your neighbors over boundary issues or blocked sight lines.
Local Fence Environment and Process Needs
Ridgefield’s corner lot sightlines present unique challenges that many homeowners don’t anticipate. Local zoning regulations limit fence heights to 3 feet maximum within 50 feet of street intersections to maintain driver visibility. This requirement affects approximately 20-30% of residential properties in town, particularly those on curved roads or cul-de-sacs where sight distance matters most.
Rocky soil conditions throughout Fairfield County add another layer of complexity. While contractors in other regions might dig post holes in 15-20 minutes, Ridgefield’s granite-laden earth can double or triple that time. Professional installers often bring specialized augers or hire mini excavators for properties with extensive bedrock, adding costs but preventing the frustration of broken equipment and incomplete holes. Your soil type directly impacts how long crews spend on your property, so asking contractors about their experience with local conditions during the estimate phase saves surprises later.
Drainage needs tied to Connecticut’s heavy spring rains and winter freeze-thaw cycles require site plans that account for water flow. A fence installed without considering how snow melt travels across your yard can create pooling, erosion, or even foundation issues near your home. Contractors familiar with Northeast weather patterns incorporate proper grading and sometimes add French drains or swales alongside fence lines, particularly on sloped properties common in Ridgefield’s hillier neighborhoods.
Utility locates through 811 become critical before any digging begins. Underground electric lines, water mains, gas pipes, and telecommunications cables crisscross residential lots, often in unexpected locations. Connecticut law requires property owners to call 811 at least two business days before excavation, giving utility companies time to mark underground infrastructure. Skipping this step can result in service interruptions, costly repairs, personal injury, and even criminal penalties under state law.
National vs. Ridgefield Installation Timelines
National averages suggest fence installations take 1-3 days for straightforward projects on flat terrain with minimal obstacles. These baseline figures work well for states with looser regulations, easier soil conditions, and faster permit processes. However, Northeast factors like extended permit reviews, challenging soil composition, and weather-related delays push Ridgefield timelines toward the longer end of the spectrum. Understanding these differences helps you set realistic expectations when contractors provide estimates.
The typical flat, 150-foot residential fence in states like Texas or Arizona might go up in 2 days with minimal preparation. In Ridgefield, that same fence often requires 3-5 days of actual installation work, plus 24-48 hours of concrete curing time between phases. The difference isn’t contractor inefficiency. It’s the reality of working with local conditions that demand more careful execution.
Typical Timeline Ranges by Fence Length
For a standard 150-foot fence on relatively flat property without significant obstacles, national benchmarks suggest 1-3 days of active installation. Ridgefield projects of similar scope average 3-5 days, accounting for soil conditions and 24-48 hour concrete cure times between post setting and panel attachment. The cure period doesn’t mean crews are actively on your property, but it does mean your fence isn’t complete and your yard remains partially disrupted during that window.
Larger projects spanning 200-300 feet can extend to 5-7 days in good weather. If your property includes slopes requiring stepped panels, rocky sections needing specialized equipment, or zoning compliance issues that weren’t caught during permit review, add another 2-3 days for adjustments and inspections. Complex commercial installations or properties with extensive landscaping to work around can stretch beyond a week, though these represent outlier cases for typical homeowner projects.
Weather plays an outsized role in Connecticut’s variable climate. Spring rains can halt digging for days if ground becomes too saturated, and summer heat waves speed concrete curing but make physical labor more challenging for crews. Fall offers the most predictable conditions, though shortened daylight hours in late October and November can slow progress. Winter installations are possible but rare, as frozen ground makes digging extremely difficult and concrete doesn’t cure properly below certain temperatures.
Day-by-Day Breakdown Models
Understanding what happens each day helps you prepare for the disruption level and know when to be home for approvals or access. Day 1 focuses on preparation and utilities, with crews marking post locations, verifying property lines, and ensuring 811 locates are complete. This phase produces minimal yard impact beyond some spray paint lines and stakes, and many homeowners don’t even realize work has started if they’re away during the day.
Day 2 brings the main disruption with post setting. Crews arrive with augers or diggers, excavate 2-3 foot holes (sometimes deeper in areas with shallow frost lines), set posts with concrete or gravel bases, and brace everything plumb. Your yard looks like a construction zone during this phase, with dirt piles, open holes, and posts standing at attention with temporary supports. Most of the loud equipment noise and dust generation happens on Day 2, making it the day you’ll want to warn neighbors about and keep pets and children inside.
Days 3-4 involve panel attachment, rail installation, and gate hanging once concrete has cured sufficiently. This phase moves quickly relative to post setting, as connecting prefabricated sections takes far less time than digging and setting foundations. Your yard starts looking like it has an actual fence rather than just a forest of posts, and the end feels near. Crews also make final adjustments to ensure panels hang straight, gates swing properly, and everything meets the specifications in your contract.
Day 5 wraps with cleanup and inspection. Contractors backfill any remaining gaps around posts, haul away excess dirt and debris, reseed bare spots, and address any grading issues created during installation. This is when your yard transitions from construction zone back to usable space, though newly seeded areas need time to establish before heavy foot traffic resumes. The final zoning inspection often happens on Day 5 or within a day or two after, closing out the project officially.
Key Steps in the Fence Installation Process
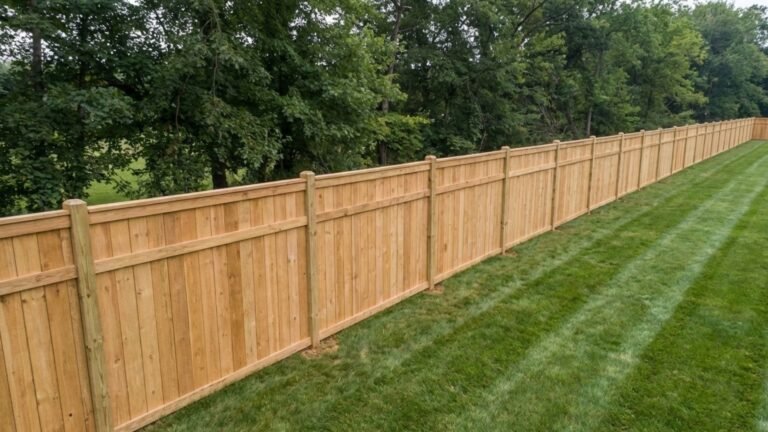
Every fence installation follows a logical sequence of phases, whether you’re putting up wood privacy panels, vinyl pickets, or chain link around a pool. The process adapts for different materials and designs, but the fundamental steps remain consistent across projects. Understanding each phase helps you prepare your property, coordinate with contractors, and recognize when something isn’t going according to plan.
Professional installers follow industry-standard practices refined over decades to produce fences that resist Connecticut’s weather extremes, meet local building codes, and provide the function you paid for. Cutting corners during any phase, from site preparation through final inspection, creates problems that may not appear immediately but will surface within the first year or two. Quality installations take time and attention to detail at every step.
Site Preparation and Layout
Site preparation begins days or weeks before installation crews arrive. Calling 811 for utility locates must happen at least two business days in advance, giving companies time to mark underground lines. This service is free in Connecticut and protects you from liability if you damage infrastructure. The marks typically last 30 days, though you may need to request remarking if delays push your installation beyond that window.
Property line surveys verify fence placement won’t encroach on neighbor’s land, a common source of disputes that can derail projects mid-installation. If your property lacks recent survey markers or you’re unsure exactly where boundaries fall, hiring a licensed surveyor costs $300-800 for typical residential lots but prevents potentially expensive boundary disputes later. Many homeowners skip this step and rely on old markers or assumptions, only to discover problems when neighbors object or inspectors flag violations.
Clearing vegetation from the fence line creates room for equipment and prevents damage to plants you want to keep. Contractors need roughly 3-4 feet of clearance on either side of the planned fence location for post hole diggers, material staging, and worker movement. Mark any underground irrigation lines, invisible dog fence wires, or landscape lighting cables so crews can work around them. Failing to identify these hidden systems often results in costly repairs and project delays.
Staking the exact fence layout with string lines and markers lets you visualize the final result and catch design issues before digging starts. Walk the perimeter with your contractor, verifying post spacing (typically 6-8 feet for residential fences), gate locations, and any adjustments needed for terrain changes. This is your last chance to make changes without incurring removal or rework costs, so take time to consider sight lines from your house, how the fence impacts yard usage, and whether gate placement makes sense for your traffic patterns.
Confirming zoning compliance through Ridgefield’s Planning and Zoning Department prevents work stoppage orders that halt construction mid-project. Verify your approved permit matches the actual installation plan, particularly regarding height, setbacks from property lines, and materials. Inspectors can and do order removal of non-compliant fences, leaving homeowners with bills for demolition, permit reapplication, and reinstallation according to proper specifications.
Post Setting and Curing
Post setting represents the most critical structural phase of fence installation. Posts carry all the fence’s weight and resist wind loads, frost heave, and ground movement over years of service. Proper depth, diameter, concrete mix, and alignment determine whether your fence stands straight for decades or leans within a few seasons.
Hole depth in Connecticut must reach below the frost line to prevent heaving during freeze-thaw cycles. The frost line in Ridgefield sits at approximately 36 inches, though some contractors dig 40-48 inches on properties with known poor drainage or heavy clay soil that holds moisture. Holes typically measure 8-12 inches in diameter, providing room for posts and concrete while minimizing unnecessary excavation that creates more dirt to dispose of.
Gravel bases at the bottom of post holes improve drainage and prevent posts from settling into soft earth over time. Contractors add 4-6 inches of crushed stone, then tamp it firm before setting posts. This base layer also helps position posts at the correct height, preventing the common problem of one post sitting lower than its neighbors and creating a crooked fence line.
Concrete setting provides the strongest anchoring method for most residential fences in New England conditions. The standard practice involves setting posts in holes, bracing them plumb in all directions, then pouring fast-setting or regular concrete around each post. The concrete should fill the hole to within 2-3 inches of ground level, with the top sloped away from the post to shed water. Many contractors mix concrete on-site for smaller jobs or bring pre-mixed bags that just need water added.
Bracing posts during the 24-48 hour cure period keeps them perfectly vertical while concrete hardens. Contractors use temporary diagonal supports staked into the ground, creating a triangulated support system that prevents movement even if someone accidentally bumps a post. Rushing this phase by removing braces too early or attaching rails before concrete fully cures can result in posts that shift out of alignment, requiring costly repairs to straighten.
Alternative post setting methods include tamped gravel (suitable for temporary fences or light-duty applications) and driven posts (used primarily for chain link in softer soils). Connecticut’s challenging soil conditions typically require concrete for permanent residential fencing, especially for privacy styles that catch significant wind load.
Panel, Rail, and Gate Attachment
Panel attachment begins once concrete has cured sufficiently to resist post movement, typically 24-48 hours depending on temperature and humidity. Contractors start at one end and work methodically across the fence line, ensuring each panel sits level and properly spaced from the ground. Most residential fences leave 2-4 inches between the bottom rail or pickets and ground level to allow drainage and prevent wood rot or vinyl damage from ground contact.
Rails attach to posts using brackets, screws, or nails depending on fence style and material. Wood fences typically use galvanized screws or ring-shank nails that resist pulling out over time. Vinyl systems employ bracket systems designed by manufacturers to accommodate thermal expansion and contraction, critical in Connecticut’s temperature swings from summer highs to winter lows. Chain link rails slide through post caps and tension bands before fabric gets stretched across the frame.
Panel installation sequences matter for maintaining straight fence lines and even spacing. Professionals measure and mark rail heights on all posts before attaching anything, ensuring consistency across the entire installation. They also account for ground slope by either stepping panels (creating a stair-step appearance) or raking them (following ground contour), depending on your preference and what local codes allow.
Gates go in last on most installations, after all panels are attached and contractors can verify proper swing clearance and alignment. Gate posts often receive extra concrete or deeper setting since they carry more stress from repeated opening and closing. Hardware includes hinges rated for the gate’s weight, self-closing mechanisms if required by pool codes, and latches that meet any security needs. Proper gate installation includes testing the full swing arc to ensure nothing obstructs movement and adjusting catches so gates latch reliably without excessive force.
Final alignment checks involve stepping back and sighting down the fence line, looking for posts that lean, panels that don’t align, or height variations that create an unprofessional appearance. Quality contractors make micro-adjustments at this stage, shimming panels if needed, tweaking post positions slightly if concrete hasn’t fully hardened, and ensuring your fence looks as good as it functions.
Additional Steps for Complex Installs
Not every property offers flat, obstacle-free terrain with perfect soil conditions. Ridgefield’s rolling topography, mature trees, and varying soil composition mean many installations require additional considerations beyond the standard process. These complexity factors can add 1-3 days to project timelines and increase costs, but addressing them properly prevents problems that could compromise your fence’s function or longevity.
Experienced local contractors recognize potential complications during site assessments and build solutions into their project plans. Homeowners who try to skip or shortcut these additional steps often end up with fences that don’t drain properly, violate zoning rules, or create neighbor disputes. Understanding common Ridgefield-specific challenges helps you evaluate contractor estimates and recognize when someone is cutting corners to underbid competitors.
Handling Slopes, Drainage, and Spite Concerns
Sloped properties require choosing between stepped panel installation and racked panels that follow ground contour. Stepped fencing creates level sections with vertical drops between panels, maintaining a traditional appearance but potentially creating gaps at the bottom where ground slopes. Racked fencing angles panels to match ground slope, eliminating gaps but requiring specialized brackets and sometimes custom panel sizes. Your choice affects both appearance and budget, with racked installations typically costing 15-25% more due to additional labor and materials.
Drainage considerations become critical on properties where fence lines run perpendicular to natural water flow. A solid fence that blocks water movement can redirect runoff toward foundations, create standing water that damages turf, or even contribute to erosion on neighbor’s downhill property. Solutions include installing French drains alongside fence lines, creating drainage swales, or switching from solid panels to semi-permeable styles like board-on-board or shadow box in problem areas. Ignoring drainage often leads to complaints from neighbors and potential liability if your fence causes water damage to adjacent properties.
Connecticut’s spite fence laws under Sections 52-480 and 52-570 prohibit structures built maliciously to annoy neighbors or block views. While defining “malice” can be subjective, courts look at factors like whether the fence serves any legitimate purpose, whether it’s unreasonably tall for the location, and whether the builder’s primary motivation was harming the neighbor rather than protecting their own property. Installing a 6-foot solid fence specifically to block a neighbor’s view, with no security or privacy benefit to your own property, could be deemed a spite fence subject to court-ordered removal.
Avoiding spite fence accusations requires documenting legitimate reasons for your fence design and location choices. If privacy from a specific sight line drives your decisions, that’s generally acceptable. If you’re primarily trying to make a neighbor miserable over an unrelated dispute, you’re venturing into legally problematic territory. Consulting with contractors about design alternatives that achieve your goals without appearing vindictive can save you from expensive legal battles down the road.
Complex installs involving multiple elevation changes, extensive drainage work, or properties with easements and setback complications can add 1-2 extra days to standard timelines. Budget for these extensions during planning rather than pushing contractors to rush, as proper execution of complexity factors separates fences that last from those that fail prematurely.
Finishing Touches and Yard Restoration
Post caps protect the tops of wooden and composite posts from water infiltration that causes rot and deterioration. Contractors install caps after panels are attached but before final inspection, using galvanized nails or specialized adhesives depending on material type. Vinyl and aluminum fences typically include integrated cap systems that snap into place, while wood posts may receive simple flat caps, decorative pyramidal tops, or solar light caps depending on your aesthetic preferences.
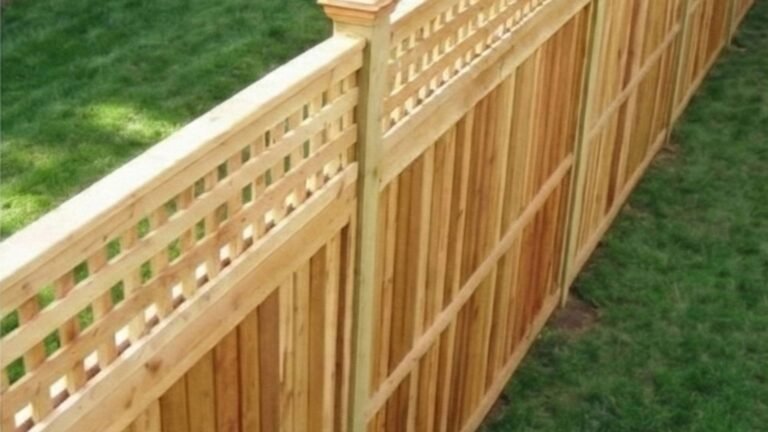
Trim work and lattice additions can enhance fence appearance and function. Adding lattice panels to the top foot or two of a fence increases height while maintaining some visual permeability, often important in front yards where solid tall fences would violate zoning rules or create an unwelcoming appearance. Trim boards covering post seams or topping fence runs create a more finished look that distinguishes professional installations from DIY projects.
Reseeding and turf repair address the bare spots, divots, and compacted earth left by equipment and foot traffic. Quality contractors include basic seeding in their bids, spreading grass seed appropriate for Connecticut’s climate and covering it with erosion-control mulch or straw. More extensive damage to established lawns may require sod replacement in high-visibility areas, adding cost but providing instant restoration compared to waiting weeks for seed to establish.
Debris removal and site cleanup should leave your yard looking better than when crews arrived, minus the old fence if you had one removed. Contractors haul away concrete rubble, scrap lumber, old fencing materials, and excess dirt generated during post hole excavation. They also pick up incidental construction debris like fastener packaging, concrete bags, and the random tools or equipment pieces that inevitably get left behind during multi-day projects.
Final grading around posts ensures water drains away from wood and composite materials that can rot if constantly wet. Contractors create subtle slopes directing water away from posts, fill any low spots that might collect water, and ensure the finished grade matches the surrounding lawn elevation. This attention to detail extends fence life and prevents the all-too-common scenario where posts rot at ground level within 5-7 years due to poor drainage.
Permits, Utilities, and Regulations in Ridgefield, CT
Compliance with local regulations represents the least exciting part of fence installation but one of the most critical for avoiding project delays, fines, and forced removal of non-conforming fences. Ridgefield’s zoning requirements reflect the town’s commitment to maintaining aesthetic standards and property values while respecting individual property rights. Understanding what’s required before you start planning saves time and money compared to discovering violations mid-project.
Many homeowners underestimate the time permits take, assuming they can apply and get approval within a week. The reality involves application submission, staff review, potential back-and-forth on design details, and formal approval processes that can span 30-45 days for straightforward projects. Properties requiring variances due to setback issues or non-conforming lot dimensions can face even longer waits as applications go before zoning boards for public hearings and votes.
Zoning and Utility Coordination
Ridgefield’s Planning and Zoning Department administers fence permits through a zoning permit process that requires site plans showing proposed fence location, height, materials, and relationship to property lines. Applications include scaled drawings of your property with the fence clearly marked, setback measurements, and often photographs showing existing conditions. The department reviews applications for compliance with zoning regulations, particularly regarding height limits, setback requirements, and special rules for corner lots near intersections.
Permit review timelines average 30-45 days, though simple applications for rear-yard fences in straightforward locations sometimes move faster. The department may request clarifications or modifications if your initial application doesn’t provide enough detail or if staff identify potential zoning conflicts. Responding promptly to these requests prevents your application from languishing in pending status for months. Some homeowners benefit from pre-application meetings with zoning staff to discuss plans informally before formal submission, catching potential issues early when they’re easier and cheaper to address.
Fees for zoning permits in Ridgefield typically start around $50 and increase based on project scope and value. While not expensive compared to construction costs, fees do add up when you include survey costs, professional plan preparation if needed, and potential variance application fees for non-conforming situations. Budget for $200-500 in total permit-related expenses as a reasonable estimate for most residential fence projects.
811 utility locates, managed through Connecticut’s Call Before You Dig program, must be requested at least two business days before any excavation. The service is free and connects you with all relevant utility companies serving your property. Gas, electric, water, telecommunications, and cable TV providers will send locators to mark underground infrastructure with color-coded flags or paint. These marks typically remain valid for 30 days, after which you must request remarking if work hasn’t been completed.
Building permits separate from zoning permits may or may not be required depending on fence height and type. Connecticut state building code generally exempts fences under 7 feet from structural permit requirements, though local municipalities can impose stricter rules. Always verify with Ridgefield’s building department whether your specific project needs a building permit in addition to zoning approval, as requirements can vary based on fence design, materials, and proximity to other structures.
Spite fence considerations should factor into your planning even if your relationship with neighbors seems cordial. Designing fences that serve obvious legitimate purposes, maintaining reasonable heights consistent with neighborhood norms, and respecting sight lines to the extent practical all help establish that your fence isn’t motivated by malice. If you’re installing a fence specifically in response to a neighbor dispute, consult with an attorney about potential spite fence implications before proceeding, as legal challenges can be expensive and result in removal orders even after you’ve paid for full installation.
What Homeowners Should Prepare For and Do
Your role in the fence installation process extends beyond signing contracts and writing checks. Active preparation on your part helps contractors work efficiently, prevents delays, and ensures the final product matches your expectations. Understanding what to expect each day lets you plan around disruptions, know when your presence is needed for approvals, and recognize when something isn’t going according to plan.
Professional contractors appreciate homeowners who prepare properly, as it makes their jobs easier and helps projects stay on schedule. The contractors who complain about difficult clients are often dealing with homeowners who didn’t understand what to expect or weren’t prepared for the realities of construction work on their property. A little preparation on your part goes a long way toward making the installation process smooth for everyone involved.
Daily Expectations During Install
Day 1 preparation and marking generates minimal disruption beyond contractors walking your property, verifying measurements, and spray-painting or staking post locations. Equipment noise is limited to hand tools and possibly a small gas-powered marker. Your main responsibility this day involves being available to answer questions about final placement details, gate locations, and any last-minute design clarifications. If you work from home, expect occasional interruptions but nothing that prevents normal household activities.
Day 2 post setting brings the project’s peak disruption with loud equipment (gas-powered augers, concrete mixers), dirt piles next to each post hole, and crew members working across your property. If you have dogs, plan to keep them inside or in a separate area, as loose pets and construction equipment don’t mix safely. Children should also stay clear of work areas, both for safety and to avoid distracting contractors from tasks requiring focus and precision. Noise levels make working from home challenging on this day, so schedule off-site meetings or work arrangements if possible.
Days 3-4 panel attachment and rail installation are relatively quiet compared to post setting, with hand tools and occasional power drills being the primary noise sources. You can largely ignore the work happening outside unless contractors need access through your home or have questions about specific details. Most homeowners find these days the easiest to live through, as the visible progress toward a finished fence creates excitement and the end feels achievable.
Day 5 cleanup and inspection involve contractors backfilling holes, hauling debris, reseeding bare spots, and conducting final walkthroughs. Plan to be present for the contractor’s final walkthrough so you can identify any concerns before they leave. This is when you verify gates swing properly, panels sit level, post caps are secure, and the fence matches what you contracted for. Address any deficiencies immediately rather than hoping contractors will return later, as getting them back for punch-list items can be challenging once they’ve moved to the next job.
Approving layout and final plumb during appropriate phases protects you from discovering problems after they’re difficult to fix. When contractors show you spray-painted post locations on Day 1, walk the entire fence line and verify you’re satisfied with placement before approving them to dig. Once holes are dug and concrete poured, moving posts requires expensive rework. Similarly, check that posts stand perfectly vertical after installation but before panels go up, as correcting leaning posts after full fence assembly requires partial disassembly.
Tips to Minimize Disruptions
Pre-clearing obstacles from the fence line a week before installation prevents day-of delays and reduces the chance of damage to items you care about. Move planters, outdoor furniture, decorative features, and anything else within 4-5 feet of the planned fence line. Trim back overhanging branches that could interfere with equipment operation or worker movement. Flag or mark any underground irrigation lines, invisible dog fence wires, or landscape lighting you want contractors to avoid damaging.
Securing pets in separate areas during work hours protects them from equipment hazards and prevents them from escaping through temporarily open fence sections. Even friendly dogs can become anxious or territorial with strangers working in their yard, potentially leading to bites or escape attempts. Cats should stay indoors during installation days, as the noise and disruption often makes them want to flee to quieter locations. If you can’t keep pets safely contained during work hours, consider boarding them for the 3-5 days of active installation.
Notifying neighbors about your fence installation schedule demonstrates courtesy and can prevent complaints about noise or temporary vehicle parking. A simple note in mailboxes or quick conversations explaining the project timeline, work hours, and how you’re minimizing impact shows respect for the shared neighborhood environment. Neighbors who know what to expect and when it will end are far more tolerant of temporary disruptions than those caught by surprise when crews and equipment show up unannounced.
Scheduling installations during off-peak seasons like fall or early spring can sometimes reduce both yard damage and timeline delays. Spring mud season in Connecticut can bog down equipment and create extensive turf damage that’s hard to repair, while summer’s packed contractor schedules may mean longer waits between project phases. Fall’s cooler temperatures and lower rainfall averages often provide ideal conditions, though you’ll want to finish before hard ground freeze makes digging extremely difficult.
Process Comparison Table: Simple vs. Complex Fence Install in Ridgefield, CT
| Phase | Simple Install (Flat Yard) | Complex Install (Slope/Drainage) |
|---|---|---|
| Permits | 30-45 days | 45+ days with variances |
| Prep & Layout | 1 day | 1-2 days with survey |
| Post Setting | 1 day, 24-48hr cure | 2 days with rocky soil |
| Panels/Gates | 1-2 days | 2 days stepped panels |
| Cleanup/Inspect | 1 day | 1 day with restoration |
| Total Timeline | 3-5 days | 5-7 days |
This comparison reflects typical Ridgefield projects accounting for local soil conditions, zoning requirements, and standard construction practices. Individual projects may vary based on property-specific factors, weather delays, or material availability issues.
Common Mistakes Homeowners Make During Fence Installation
Skipping professional surveys to save a few hundred dollars ranks among the most expensive mistakes homeowners make. Property lines aren’t always where you think they are, and that assumption about the iron pin location can be wrong by several feet. Installing a fence even inches over your property line onto a neighbor’s land creates a boundary encroachment that may require costly removal and reinstallation, especially if discovered years later during property sales or surveys for other purposes. The survey cost pales compared to legal fees and reconstruction expenses if you guess wrong.
Ignoring 811 utility locates tempts homeowners and contractors who think they know where utilities run. The reality is that underground infrastructure often takes indirect routes, changes depth unpredictably, and may not match what property owners assume based on where lines enter their house. Hitting a gas line can cause explosions and evacuation of nearby homes. Severing electric lines can electrocute workers and cause outages affecting neighbors. Damaging telecommunications cables may result in service interruptions and repair bills running thousands of dollars. The free 811 service exists precisely to prevent these scenarios.
Rushing concrete cure times to speed project completion creates structural weakness that manifests as leaning posts within months. Concrete achieves only a fraction of its final strength in the first 24 hours, with full curing taking 28 days though practical working strength arrives sooner. Attaching rails and hanging panels while concrete is still relatively soft allows post movement that’s hard to correct later. Quality contractors respect cure times even when homeowners push for faster completion, as they understand the long-term problems caused by rushing this critical phase.
No neighbor notification about major construction projects breeding resentment and complaints, even when you’re technically within your rights. Simple courtesy, like letting adjacent property owners know when crews will be working and roughly how long the project will take, goes a long way toward maintaining good relations. Neighbors who feel blindsided by noise, dust, and equipment blocking their views or access tend to scrutinize your project for any potential violations and may contact zoning officials with complaints. A five-minute conversation or quick note prevents this adversarial dynamic and keeps neighborhood relationships positive.
Preparing Your Property for Fence Installation in Ridgefield, CT
Surveying exact boundaries before any planning begins gives you confidence that your fence will sit legally on your property. Many homeowners rely on old markers, fence lines from previous owners, or assumptions about where property lines run, only to discover during installation that boundaries aren’t where they thought. Professional surveys cost $300-800 for typical residential lots and provide legally defensible documentation of boundary locations, valuable both for fence installation and future property transactions.
Trimming overhanging branches along the fence line prevents damage to trees you want to keep and creates clearance for equipment and materials. Contractors need roughly 4-5 feet of working space on either side of where the fence will go, and low-hanging branches in that zone may get broken by workers or equipment if not trimmed back first. Taking time to do this pruning yourself saves on contractor costs and ensures cuts are made properly to promote tree health rather than quick chops that may harm valuable landscape features.
Confirming setback compliance and sight line requirements through Ridgefield’s Planning and Zoning Department before finalizing fence placement prevents expensive errors. Corner lots face particularly strict rules about fence heights near intersections, where visibility triangles must remain clear for traffic safety. Even mid-block properties may have setback requirements keeping fences a certain distance from property lines, utilities, or easements. Getting these details right during planning is far easier than discovering violations during installation or after completion when correction requires removal and reinstallation.
Frequently Asked Questions About Fence Installation Checklist in Ridgefield CT
Q: What is the typical fence installation process in Ridgefield, CT?
A: The process begins with permit applications and site preparation, followed by post setting and concrete curing, then panel and gate attachment, and finally cleanup with zoning inspection. Total timelines range from 3-7 days of active work depending on property conditions and project complexity. Permit review adds 30-45 days upfront before installation can begin.
Q: How long will my yard be torn up during fence installation?
A: The heaviest yard disruption occurs on Day 2 during post hole digging and concrete pouring, creating dirt piles and holes that remain for 24-48 hours while concrete cures. Most properties see full restoration within 5-7 days from when installation starts, with reseeding completing the process in the same week. Rocky soil or drainage work may extend active disruption by 1-2 days but rarely longer.
Q: Are permits required for fence installation in Ridgefield?
A: Yes, most fence installations require zoning permits through Ridgefield’s Planning and Zoning Department, particularly for fences over certain heights or within setback areas. Building permits may also be needed depending on height and design. Applications take 30-45 days to process, so plan accordingly and don’t schedule installation until permits are in hand.
Q: What should I expect on fence installation day 1?
A: Day 1 involves site preparation with contractors marking exact post locations, verifying utility locates are complete, and staking string lines to visualize the fence layout. You won’t see major digging yet, just marking activities and final verification of placement before crews commit to excavation on Day 2.
Q: How can I prepare my yard for fence installation?
A: Clear obstacles within 4-5 feet of the planned fence line, including furniture, planters, and decorative features. Trim overhanging branches, mark any underground irrigation or lighting systems, and secure pets in areas away from where work will occur. Having water access available for crews and clear paths for equipment helps installations proceed smoothly.
Q: What are spite fence laws in Connecticut and how do they affect my installation?
A: Connecticut law prohibits fences built maliciously to annoy neighbors or block views without serving legitimate purposes for the property owner. Courts examine factors like necessity, reasonableness of height, and builder’s motivations when determining if a structure qualifies as a spite fence. Design fences that serve clear privacy, security, or aesthetic functions for your property rather than solely targeting neighbors to avoid legal challenges.
Q: Do I need to call 811 before fence installation?
A: Yes, Connecticut law requires calling 811 at least two business days before any excavation to have underground utilities marked. This free service protects you from hitting gas, electric, water, or telecommunications lines that can cause injuries, service interruptions, and expensive damage claims. Skipping this step can result in fines and liability for any damage to underground infrastructure.
Q: How deep do fence posts need to be in Ridgefield?
A: Posts should extend at least 36 inches deep to reach below Connecticut’s frost line, preventing heaving during freeze-thaw cycles. Some contractors go 40-48 inches on properties with poor drainage or heavy clay soil. Proper depth combined with concrete setting ensures posts remain stable through harsh New England winters.
Q: Can I install a fence right on my property line?
A: Ridgefield zoning may require setbacks from property lines depending on your specific zoning district and fence location. Check with the Planning and Zoning Department about setback requirements before finalizing fence placement. Even if technically allowed on the line, installing slightly inside your property boundary can prevent boundary disputes and makes maintenance easier by ensuring all fence components remain on your land.
Q: What fence heights are allowed in Ridgefield?
A: Front yards typically allow up to 4 feet, while side and rear yards often permit 6 feet with proper setbacks. Corner lots face stricter limitations near intersections, where heights may be limited to 3 feet within 50 feet of the corner to maintain sight lines. Specific regulations vary by zoning district, so verify requirements with the Planning and Zoning Department during permit application.
Final Thoughts
Following a comprehensive fence installation checklist in Ridgefield CT transforms what could be a stressful, confusing project into a manageable process with predictable outcomes. Understanding that timelines typically span 3-7 days of active work, with the heaviest yard disruption concentrated during post setting on Day 2, helps you prepare realistically and set appropriate expectations for your family and neighbors. The key factors determining success include early permit applications through Ridgefield’s Planning and Zoning Department, proper utility locates via 811, respect for local height and setback regulations, and choosing experienced contractors familiar with Connecticut’s rocky soil and weather challenges. Your proactive preparation, like clearing obstacles, securing pets, and verifying property boundaries before work begins, minimizes delays and helps installations proceed smoothly from layout through final inspection.
The long-term value of investing in compliant, professionally installed fencing extends well beyond the completion date. A properly permitted fence that respects setbacks and height limits protects you from removal orders, fines, and neighbor disputes that can surface years after installation. Quality construction using appropriate materials and techniques for Northeast conditions means your fence will stand straight through winter freeze-thaw cycles, resist rot in Connecticut’s humid summers, and maintain its appearance for decades rather than leaning or deteriorating within a few seasons. The relatively short period of yard disruption during installation pays dividends in years of security, privacy, and property definition that enhance your home’s value and your quality of life.
While Tri State Geese Patrol specializes in humane goose control rather than fence installation, we understand the importance of property boundaries and protecting your outdoor spaces from unwanted intrusions. Our professionally trained border collies provide effective, environmentally-friendly solutions for Canadian geese management throughout Connecticut, Massachusetts, and New York, keeping your newly fenced yard free from the mess and damage geese populations can cause. With over 11 years of experience serving residential and commercial properties, we’re committed to cost-effective strategies that respect wildlife while preserving your property’s usability and appearance. If your fence installation project is part of broader efforts to reclaim and protect your outdoor spaces, consider how our geese patrol services can complement your investment by ensuring those areas remain clean, safe, and enjoyable year-round. Contact Tri State Geese Patrol today to learn how our trained canine teams can help you maintain the pristine property you’ve worked so hard to create.