
What to Expect During Your Fence Installation: A Complete CT and NY Homeowner's Guide
By Tony Pellicone15 min readPublished
- fence installation
- what to expect
- project timeline
- homeowner guide
Have you ever watched a fence crew roll into your neighbor's driveway and wondered exactly what goes on during those few days of hammering, digging, and equipment noise?
Most Connecticut and New York homeowners feel curious about the fence installation process, especially when they're planning their own project. Between our region's deep frost lines, strict zoning regulations, and challenging terrain, fence installation here involves more steps than you might expect.
The good news is that professional crews follow a predictable sequence that minimizes disruption to your daily routine while ensuring your new fence meets all local codes and withstands our harsh winters. Understanding what happens during each phase can help you prepare your property, set realistic expectations, and feel confident about the investment you're making in your home.
Key Takeaways
Fence Projects Take 2-5 Days in CT and NY
Simple installations on flat ground typically wrap up in 2-3 days, while slopes, wetlands, or complex layouts can extend to 5 days with proper curing time
Post Installation Forms the Foundation
Holes must reach below the 36-48 inch frost line common in our region, with concrete curing taking 24-48 hours for maximum stability
Preparation Prevents Problems
Calling 811 for utility marking, clearing vegetation, and checking zoning requirements helps identify potential setback or sight line issues early
Panels and Gates Come Last
Rails install first for proper drainage, maintaining 4-inch maximum gaps, while pool gates require self-latching mechanisms at 4-foot minimum heights
Permits vary by Location
Zoning approval is often required with 10-30 day processing times, though building permits may not be needed for fences under 6-7 feet
Cleanup and Final Inspection Included
Professional installations include debris removal, level checks, and yard restoration as standard practice
Understanding the Fence Installation Process in CT and NY
Professional fence installation in Connecticut and New York follows a methodical approach that accounts for our region's unique challenges. Northeast properties often feature mature trees, sloping terrain, and strict building codes that emphasize frost protection, proper setbacks, and environmental buffers. Connecticut's spite fence laws prohibit unnecessarily tall fences built purely to annoy neighbors, while wetlands regulations require special erosion controls within 75-150 foot buffer zones.
The installation process adapts to these regional requirements while maintaining efficiency and quality. Crews understand that rushing through steps like concrete curing or skipping permit verification can lead to costly problems down the road. Weather also plays a significant role, as frozen ground conditions or heavy rain can delay certain phases of the work.
Local Environment and Process Considerations
Regional factors significantly impact how fence installation unfolds on Connecticut and New York properties. Heavily wooded lots require initial vegetation clearing and careful equipment access planning. Corner sight triangles mandated by local zoning often limit fence heights near intersections, while mature root systems may require hand-digging around established trees.
Most residential projects involve heights between 4-6 feet, which typically fall within standard zoning allowances. However, verification remains important since setback requirements can vary dramatically between municipalities, sometimes measured in inches from property lines rather than feet.
Timeline Expectations for CT and NY Installations
Fence installation timelines in our region typically extend beyond national averages due to several factors specific to the Northeast. The need for deeper post holes, longer concrete curing periods, and more complex permit processes all contribute to project duration.
Typical Timeline Ranges by Project Scope
A standard 150-200 foot fence installation on relatively flat terrain usually requires 3-4 days from start to finish. This includes proper curing time for concrete footings, which cannot be rushed regardless of project deadlines. Complex installations involving slopes, pool barriers, or wetland considerations can extend to 5-7 days.
Weather conditions significantly affect these timelines. Spring installations may face delays from saturated soil conditions, while summer projects benefit from optimal concrete curing temperatures. Fall installations often proceed smoothly, though crews must account for shorter daylight hours.
Day-by-Day Process Breakdown
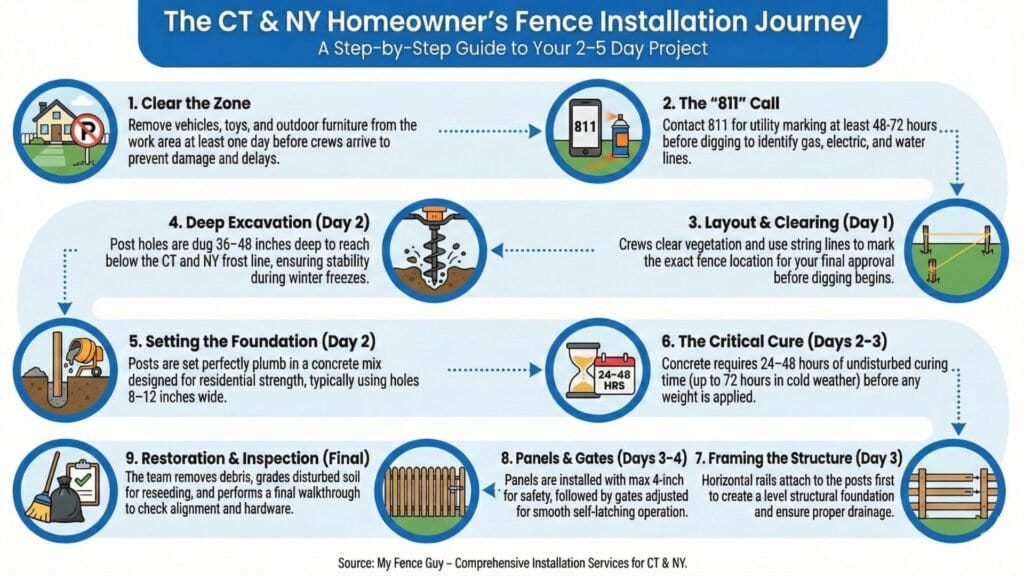
Day one typically focuses on site preparation activities that take 4-6 hours to complete properly. This includes utility verification, vegetation clearing, and precise layout marking. No major excavation occurs on the first day, allowing time for any last-minute adjustments to the planned fence line.
Day two involves the bulk of post-hole excavation and setting. Posts must be buried below the frost line, which ranges from 36-48 inches throughout Connecticut and varies from 24-48 inches across different New York counties. Concrete placement and initial bracing happen this day, beginning the critical curing period.
Days three and four focus on framing installation, panel attachment, and gate hanging. The specific sequence depends on fence material and style, but horizontal rails are always installed before vertical elements. Final adjustments and hardware installation typically conclude on day four for standard projects.
Day-by-Day Installation Breakdown
- 1
Day One: Site Preparation
Utility verification, vegetation clearing, and layout marking take 4-6 hours, with no major excavation.
- 2
Day Two: Post Setting
Crews excavate holes below the frost line, then place concrete and bracing to begin the curing period.
- 3
Days Three and Four: Framing and Gates
Horizontal rails go up first, followed by panel attachment, gate hanging, and final hardware adjustments.
Core Steps in Professional Fence Installation
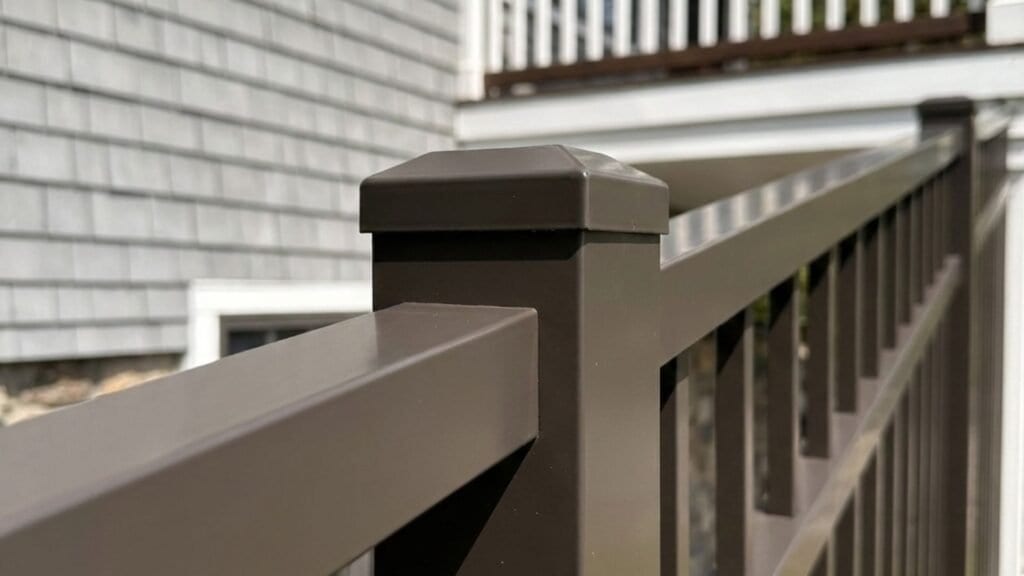
Every professional fence installation follows fundamental steps designed to create a durable, code-compliant barrier. While specific techniques may vary based on materials and site conditions, the overall sequence remains consistent across different project types.
Site Preparation and Layout
The installation process begins with calling 811 to mark underground utilities, a step that must occur at least 48-72 hours before digging begins. This marking service identifies gas lines, electrical cables, water mains, and telecommunications infrastructure that could be damaged during excavation.
Vegetation clearing comes next, removing brush, small trees, and debris along the planned fence line. Crews use string lines and stakes to mark the exact fence location, allowing homeowners to review and approve the layout before any permanent work begins. This stage also includes verifying property boundaries and checking for any zoning setback requirements that might affect placement.
Post Excavation and Setting
Post holes require careful attention to depth and width specifications. Connecticut's frost line typically reaches 36 inches, while New York varies by region, making proper depth critical for long-term stability. Holes are typically dug 8-12 inches wide to accommodate post size and concrete placement.
A gravel base provides drainage at the bottom of each hole before post placement. Posts must be set perfectly plumb and at consistent heights, requiring careful measurement and adjustment. Concrete mixing follows manufacturer specifications, typically using a 3000 PSI mix that provides adequate strength for residential applications.
The curing process cannot be rushed, regardless of weather or schedule pressures. Posts require 24-48 hours of undisturbed curing time before any additional weight or stress is applied. This timeline may extend to 72 hours in cold weather conditions or when using certain concrete formulations.
Framing and Panel Installation
Horizontal rails attach to posts first, providing the structural foundation for the entire fence system. These rails must be level and properly spaced to make sure panels fit correctly and maintain a consistent appearance. Rail placement also affects drainage, as water should flow freely through or around the fence structure.
Panel installation follows rail completion, with careful attention to spacing and alignment. Maximum gaps of 4 inches between pickets or panels keep the fence safe while maintaining privacy and security functions. Pool barrier installations require special attention to climbing prevention and gap specifications.
Gate installation represents the final major construction phase. Gates require precise measurements and adjustments to get smooth operation and proper latching. Pool gates must include self-closing and self-latching mechanisms that operate from the pool side, with latches positioned at least 54 inches above ground level.
Specialized Installation Considerations
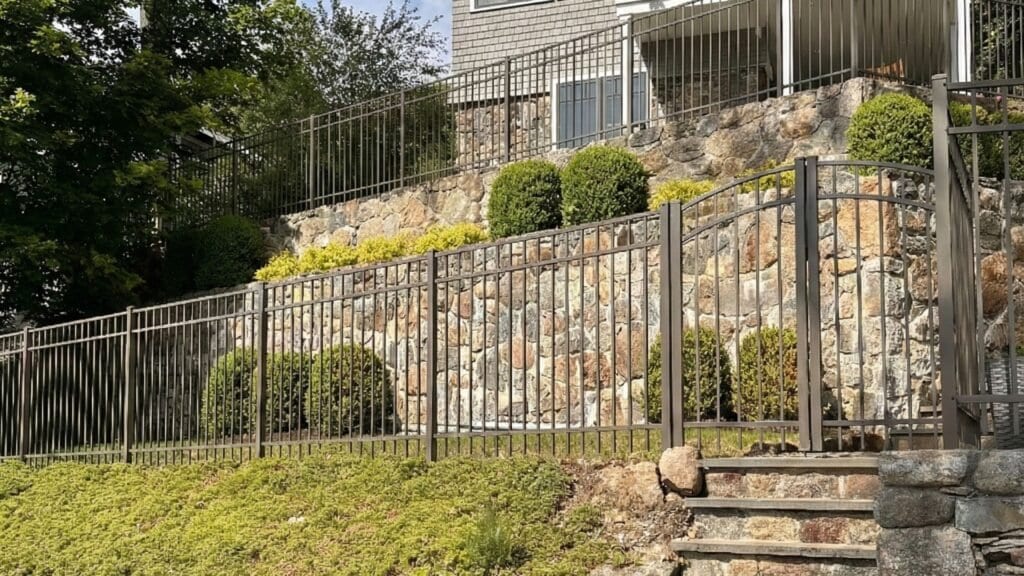
Some fence installations require additional steps and skills beyond standard residential projects. Pool barriers, sloped terrain, and environmental restrictions all add complexity that affects both timeline and cost.
Slope and Terrain Challenges
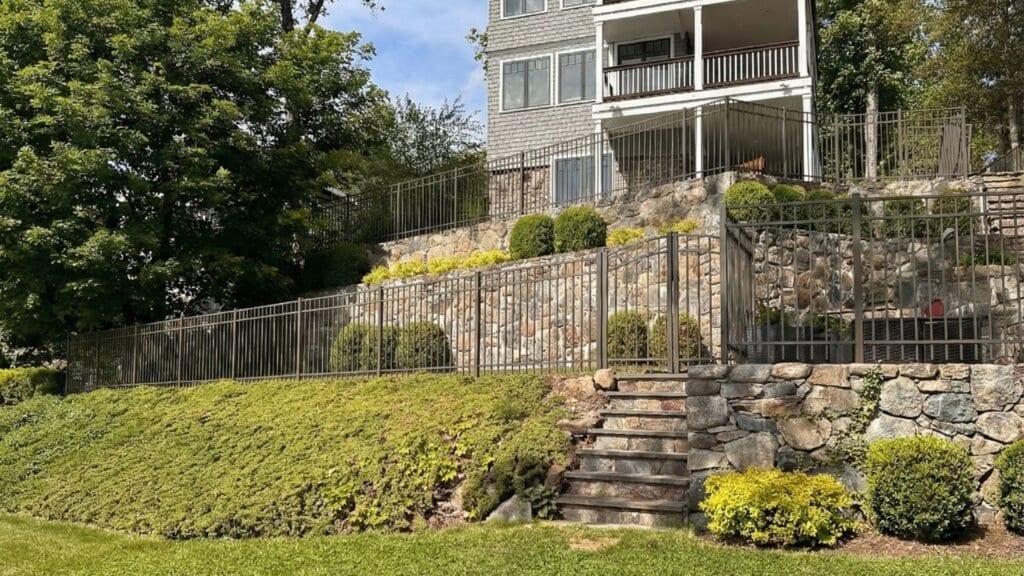
Sloped properties require either stepped or racked panel installation techniques. Stepped installations maintain level panel orientation by adjusting post heights, creating a stair-step appearance that works well with dramatic elevation changes. Racked installations angle panels to follow ground contours, providing a more flowing appearance on gentle slopes.
Pool barrier requirements add significant complexity to fence installation projects. Minimum heights of 4 feet apply, with additional restrictions on climbing aids and gap dimensions. Self-closing and self-latching gates must operate reliably and resist defeat by children.
Wetlands and Environmental Considerations
Properties within 75-150 feet of wetlands face additional regulatory requirements that can significantly impact installation procedures. Erosion control measures become mandatory, often requiring silt fencing and sediment barriers during construction. These controls must remain in place until vegetation is fully established.
Environmental restrictions may limit equipment access, requiring hand tools for excavation in sensitive areas. Material staging also requires careful planning to minimize disturbance to protected vegetation or wildlife habitat areas.
Finishing Work and Site Restoration
Professional installations include thorough cleanup and site restoration services. Post caps, trim pieces, and hardware receive final adjustments during this phase. Any damaged landscaping gets repaired or replaced according to the original contract terms.
Debris removal includes all construction waste, excess concrete, and packaging materials. The work area should be left cleaner than it was found, with disturbed soil areas properly graded and prepared for reseeding if necessary.
Permits, Regulations, and Legal Requirements
Connecticut and New York fence installations must comply with various permits and regulations that vary significantly between municipalities. Understanding these requirements helps prevent delays and keeps the project compliant from start to finish.
Zoning and Building Permit Requirements
Zoning permits are commonly required for fence installations, even when building permits are not. Application fees typically range from $50-150, with processing times extending 10-30 days in some jurisdictions. Site plans showing fence location, height, and materials are usually required as part of the application process.
Building permits may be required for fences exceeding 6-7 feet in height, depending on local codes. However, most residential fence installations fall below these thresholds and can proceed with zoning approval alone. Professional contractors typically handle permit applications as part of their service packages.
Utility Coordination and Safety
Utility marking through 811 is mandatory before any excavation begins. This free service prevents costly utility strikes that can result in service interruptions, safety hazards, and significant repair expenses. Markings remain valid for specific time periods, typically 30 days, after which remarking may be required for extended projects.
Some utilities may require additional clearances or special installation techniques near their infrastructure. Gas lines, electrical panels, and water meters often have minimum distance requirements that can affect fence placement options.
Homeowner Preparation and Expectations
Successful fence installations require cooperation between contractors and homeowners throughout the process. Proper preparation can significantly reduce project delays and help the job finish smoothly.
Daily Process Expectations
- 1
Day 1: Layout and Setup
Expect the most site disruption and moderate noise from hand tools while crews establish work areas, and stay available to approve the fence line layout.
- 2
Days 2-3: Peak Disruption
Power augers or small excavators for post holes bring the highest noise levels, with concrete mixing and placement adding to the activity.
- 3
Final Days: Quiet Finishing
Noise drops off during gate adjustments and hardware installation, though crews still need property access and may want your input on gate operation.
The first day involves the most site disruption as crews establish work areas and begin layout activities. Noise levels remain moderate during this phase, consisting mainly of hand tools and small equipment operation. Homeowners should be available for layout approval and any necessary adjustments to the planned fence line.
Days two and three typically involve the heaviest equipment use and the highest noise levels. Post hole digging requires power augers or small excavators that generate significant noise for several hours. Concrete mixing and placement add to the activity level, though crews work efficiently to minimize disruption duration.
Final installation phases produce less noise but require continued property access. Gate adjustments and hardware installation may need homeowner input to make sure proper operation and security features meet expectations.
Minimizing Installation Disruptions
Preparing your property in advance helps installation crews work efficiently and safely. Remove vehicles, toys, outdoor furniture, and other obstacles from the work area at least one day before crews arrive. Pet arrangements should be made for the entire installation period, as open gates and equipment pose safety risks.
Utility access should remain clear throughout the project. Water spigots may be needed for concrete mixing, while electrical outlets can power tools and equipment. Discussing these needs with contractors during the planning phase prevents last-minute complications.
Installation Process Comparison: Simple vs Complex Projects
Hover or tap a row to highlight it.
| Factor | Simple Project | Complex Project |
|---|---|---|
| Timeline | 2-3 days | 5-7 days |
| Terrain | Flat, open ground | Slopes, pool barriers, or wetlands |
| Excavation | Standard power augers | Hand-digging in sensitive or root-heavy areas |
Common Installation Mistakes and How to Avoid Them
Several mistakes can compromise fence installation quality or create legal problems. Skipping the 811 utility marking process risks serious injury and property damage, while rushing concrete curing leads to unstable posts that fail during freeze-thaw cycles.
Poor property access planning can significantly increase installation costs and timelines. Crews need adequate space for equipment operation and material staging. Homeowners who fail to provide this access may face additional charges for hand-carrying materials or using specialized equipment.
Inadequate final walkthrough inspections allow problems to go unnoticed until after crews have left the site. Taking time to check post alignment, gate operation, and overall workmanship quality makes sure any issues get addressed promptly while contractors are still on site.
Property Preparation Checklist for CT and NY Installations
Contact 811 for utility marking at least 48-72 hours before the scheduled installation date. This service is free and required by law, but requires advance notice to allow accurate marking. Clear all personal items from the work area, including outdoor furniture, grills, play equipment, and decorative items that could be damaged or interfere with installation.
Trim any overhanging branches that might interfere with equipment operation or worker safety. Mark any underground irrigation systems, invisible dog fences, or other utilities not covered by 811 marking services. Verify property boundaries using survey markers or recent survey documents to prevent encroachment issues.
Arrange alternative accommodations for pets during the installation period. Open gates, loud equipment, and strangers on the property can stress animals and create safety risks for both pets and workers. Secure indoor access points to prevent pets from escaping during periods of increased activity.
Frequently Asked Questions About the Fence Installation Process
Q: What is the typical fence installation process timeline for CT and NY properties? A: Most residential fence installations require 3-5 days from start to finish. Simple projects on flat terrain typically complete in 2-3 days, while complex installations involving slopes, pool barriers, or environmental restrictions can take 5-7 days. Weather conditions and concrete curing requirements can affect these timelines.
Q: How long does concrete need to cure during the installation process? A: Post concrete requires 24-72 hours of curing time before additional construction can proceed. This timeline varies based on weather conditions, concrete type, and post size. Cold weather extends curing times, while hot weather may accelerate the process.
Q: Do I need permits for fence installation in Connecticut or New York?
A: Most fence installations require zoning permits, even when building permits are not needed. Requirements vary significantly between municipalities, with processing times ranging from 10-30 days. Professional contractors typically handle permit applications as part of their services.
Q: What should I expect on the first day of fence installation?
A: The first day focuses on site preparation activities, including utility verification, vegetation clearing, and precise layout marking. Crews typically spend 4-6 hours on these activities without major excavation or noise-generating work. Homeowner approval of the final layout usually occurs before the first day concludes.
Q: How can I prepare my property for fence installation?
A: Remove all personal items from the work area, arrange pet accommodations, and keep access clear for equipment and materials. Call 811 for utility marking at least 48-72 hours in advance, and trim any overhanging vegetation that might interfere with the installation process.
Q: What happens if utilities are discovered during installation?
A: Professional crews stop work immediately if unmarked utilities are encountered during excavation. The utility company and local authorities are contacted to safely expose and verify the line location. This can delay installation by several days while proper clearances are obtained.
Q: Can fence installation proceed during the winter months in CT and NY?
A: Winter installations face challenges from frozen ground conditions and extended concrete curing times. Many contractors prefer to schedule installations during the spring through fall months when ground conditions are optimal. However, emergency repairs and some installations can proceed with specialized techniques and equipment.
Q: What warranty coverage applies to fence installation work? A: Warranty terms vary between contractors but typically cover workmanship for 1-2 years and materials according to manufacturer specifications. Post stability, gate operation, and overall structural integrity are commonly covered. Weather damage and normal wear are usually excluded from warranty coverage.
Test Your Fence Installation Knowledge
1. How far in advance must you call 811 for utility marking before digging?
2. How long does post concrete typically need to cure before more construction proceeds?
3. What is the maximum gap allowed between pickets or panels?
4. Which part of the fence is installed first?
5. How deep must fence posts be set in CT and NY?
Pick an answer to begin.
Final Thoughts
Professional fence installation in Connecticut and New York represents a significant investment in your property's security, privacy, and value. Understanding the complete process from initial preparation through final cleanup helps you make informed decisions and set realistic expectations. The combination of our region's challenging climate, strict regulations, and varied terrain requires experienced contractors who understand local requirements and proven installation techniques.
When you're ready to move forward with your fence project, My Fence Guy provides full installation services throughout Connecticut and New York. Our experienced teams handle every aspect of the process, from permit applications and utility coordination through final cleanup and warranty support. Call us at (203) 746-1100 for a free estimate, or reach out through our contact page.
Fence Installation Key Terms
Tap a term to see what it means.
Frost Line. The depth to which ground freezes in winter, roughly 36 to 48 inches across Connecticut and New York, below which posts must be set to prevent heaving.
More about fences
When Is the Best Time of Year to Install a Fence in Connecticut?
The best time to install a fence in Connecticut is usually late spring or early fall. Winter installs, permit and 811 lead times, and how far ahead to book.
Read the guide to When Is the Best Time of Year to Install a Fence in Connecticut?How Long Does Fence Installation Take? A Homeowner's Guide to Timeline Expectations
When you finally decide to install that new fence around your property, the first question that probably pops into your mind isn't about costs or...
Read the guide to How Long Does Fence Installation Take? A Homeowner's Guide to Timeline ExpectationsHow Deep Should Fence Posts Be in Connecticut? Frost Line and Footings
How deep to set fence posts in Connecticut: frost depth, manufacturer depth rules by fence height, concrete or gravel, and how frost heave lifts posts.
Read the guide to How Deep Should Fence Posts Be in Connecticut? Frost Line and Footings